How to connect to a remote node within GUI wallet
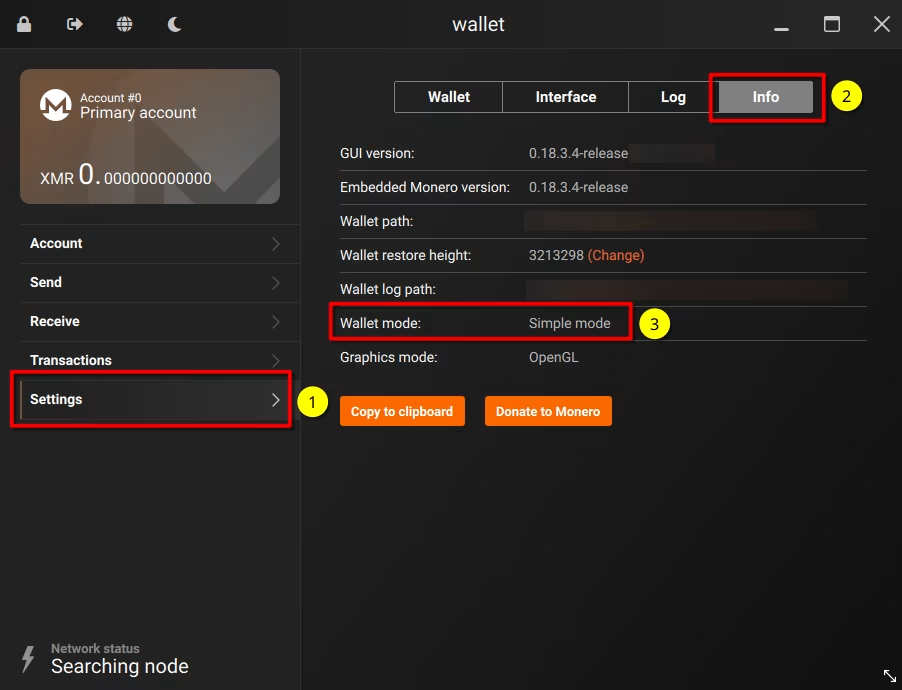
Check if your wallet is in advanced mode
To use a custom remote node, your wallet must be in advanced mode. Simple mode and Simple mode (bootstrap) don't support this feature.
To check if your wallet is in advanced mode, go to Settings > Info and see Wallet mode.
If your wallet is not in Advanced mode, you will have to change it to Advanced mode (see next step).
If your wallet is already in Advanced mode, you can skip the next step.
Change your wallet to advanced mode
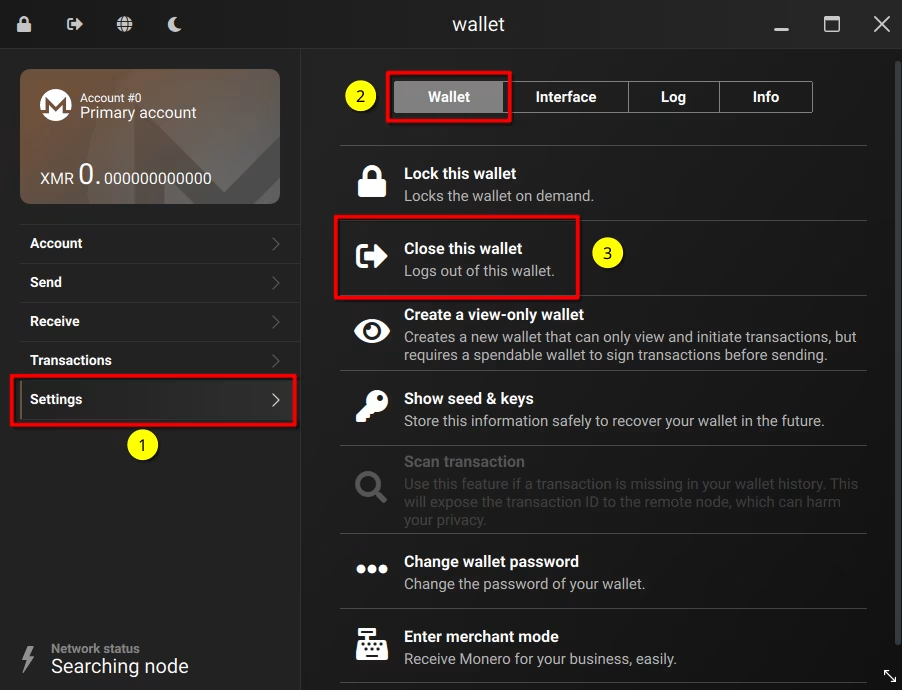
If your wallet is open, you need to close it first. Go to Settings > Wallet > Close this wallet
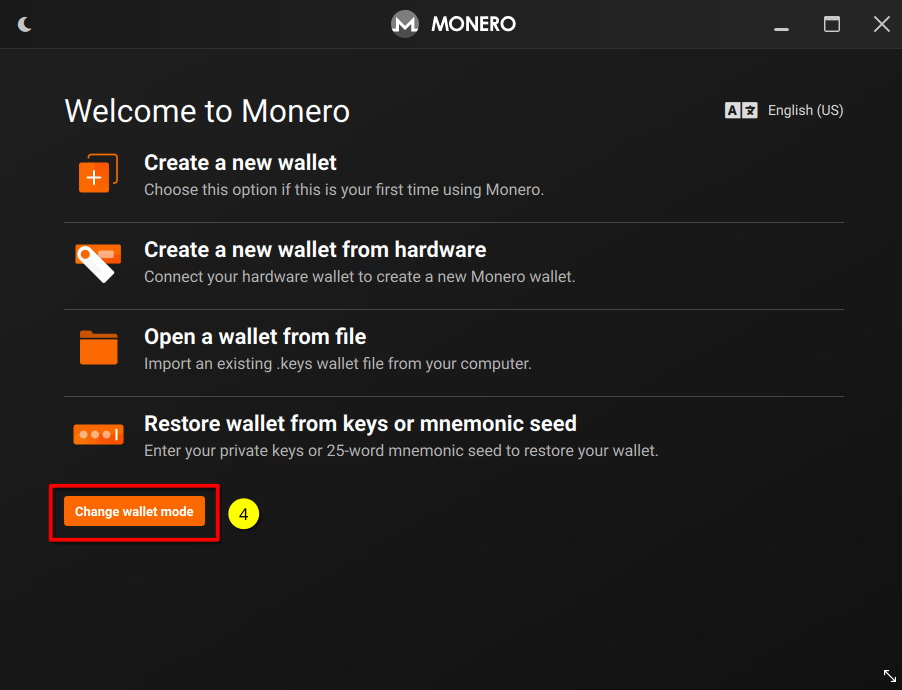
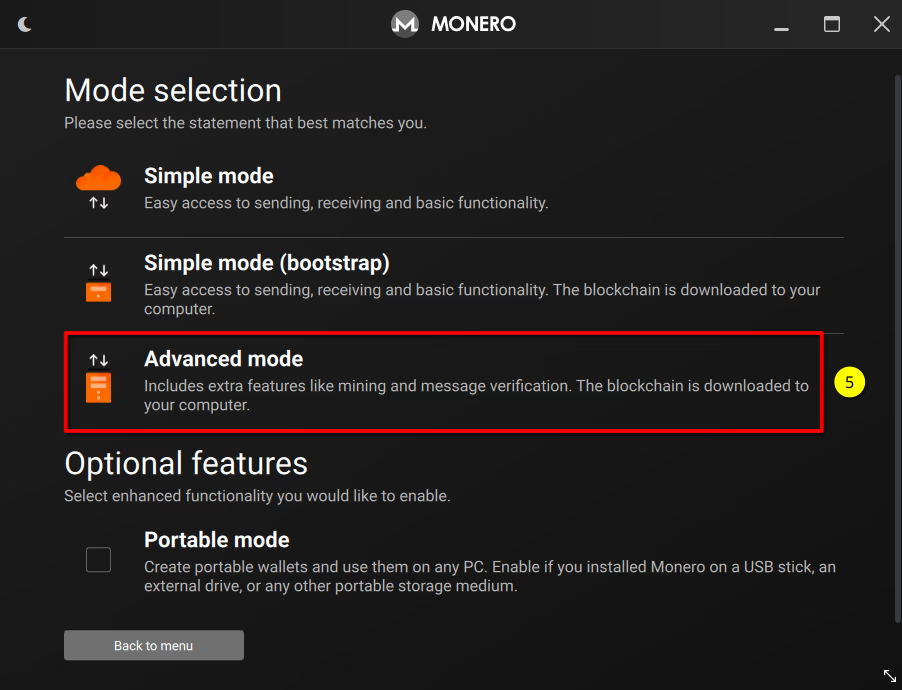
The main menu (Welcome to Monero screen) will open. At the bottom left, click on Change wallet mode button, and on the next page select Advanced mode. Next, open your wallet file again.
Finding a remote node
First, you will need to find a node to connect to.
It is important to note that there are publicly advertised remote nodes which are run by malicious actors with the sole purpose of deanonymizing users/outputs by, for example:
- Linking clearnet IP addresses to txid's.
- Providing bogus decoys to determine which output is the real spend.
- For more information see YouTube - Breaking Monero Episode 07: Remote Nodes
It is highly recommended that you either A) Run your own node, or B) Use a Trusted remote node - one that is controlled by someone that you trust.
Though highly discouraged, you may opt to use an untrusted remote node. To maximize privacy, Tor or I2P nodes are preferred. The website monero.fail has a list of such nodes.
Configuring your wallet to connect to a custom remote node
When opening your wallet, a pop up will appear with the option Use custom settings. Click on it, and you will be sent to Settings > Node page.
If you don't see this pop up, go to Settings > Node page.
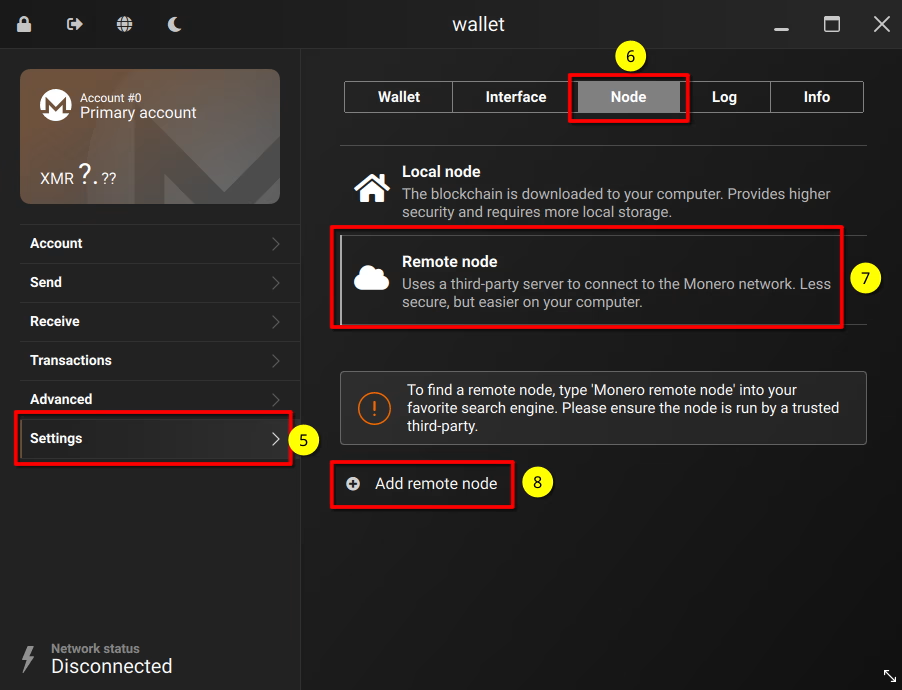
On the following page, select Remote Node.
In the Address field you will enter the address (or IP) of the node that you want to connect to, and in Port field you will enter the port of the node.
Example: If a node is listed as node.getmonero.org:18089, the address is node.getmonero.org and the port is 18089. Note: node.getmonero.org:18089 is for illustration purposes only. It is not a real node address.
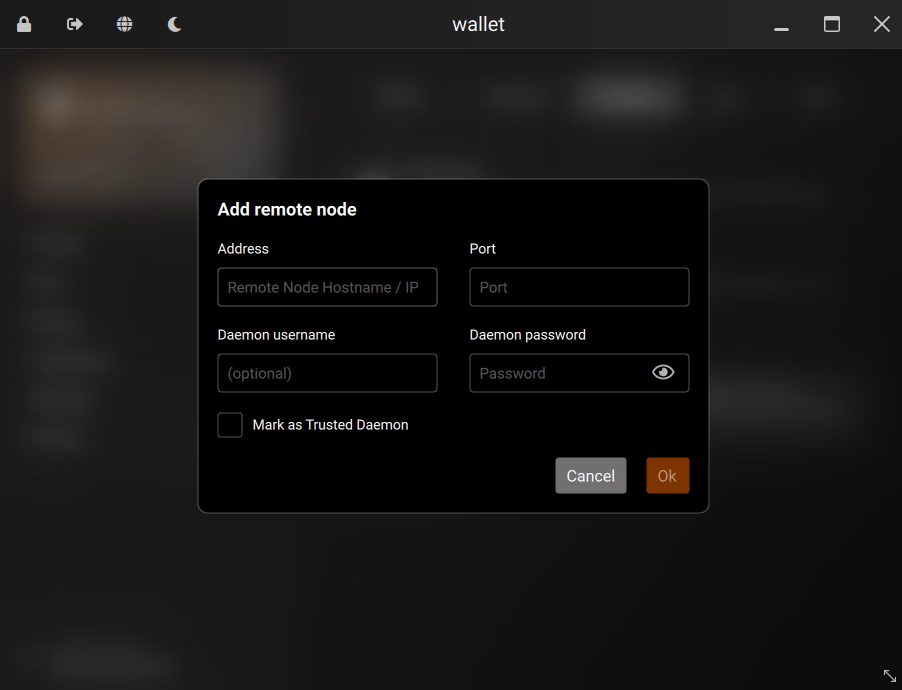
If the node requires authentication, you can enter the username in Daemon username and the password in Daemon password.
Finally, click on the Connect button and wait for your wallet to connect.
